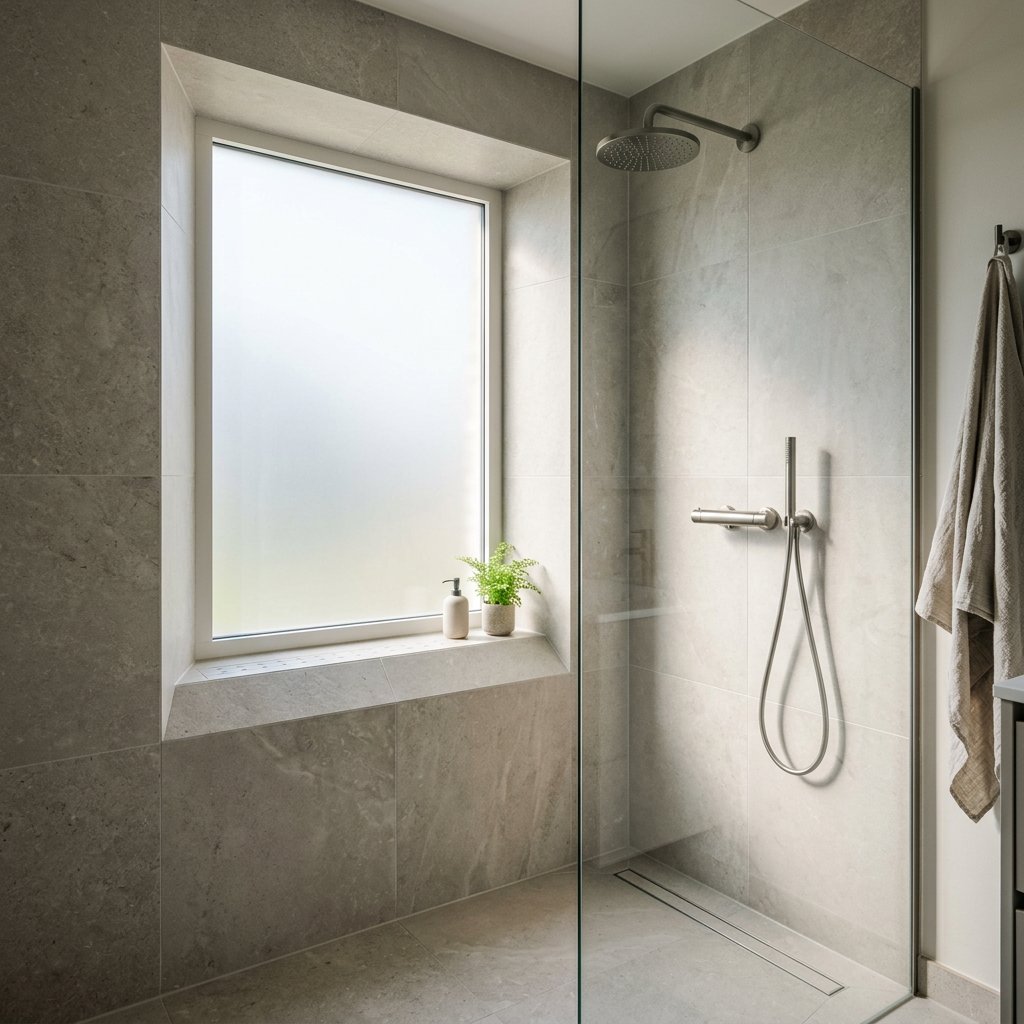
Window in the shower
A window in the shower doesn't have to be a drawback. When properly installed and finished, it actually lets in more natural light, creates a more spacious feel, and makes the bathroom more pleasant. The key, however, is to find smart solutions for water splashes, ventilation, and privacy.
The main difference is whether the window is actually located in the wet area or just next to the shower. That determines which layout works, which window solution is appropriate, and how to keep the entire area watertight and easy to maintain.
When a Shower Next to a Window Works Well
A shower next to a window works best when three factors are right: how much water splashes onto the window, how quickly the space dries, and how much privacy you need. If the window is next to the shower or diagonally in front of it, the impact is often minimal. If the window is actually within the shower area, the glass, frame, windowsill, and seals must all be suitable for a wet environment.
Details make a difference, too. The material of the window frame, the height of the windowsill, and the direction in which the window opens determine how much adjustment is needed. Natural light is a major advantage, as long as comfort and watertightness are maintained.
Smart layouts for a shower or walk-in shower next to a window
- A shower next to the window is usually the simplest solution. You get to enjoy natural light, while the window doesn't get wet as directly.
- A shower that’s partially in front of a window can work well with a fixed side panel—such as in a walk-in shower with a side panel—so that most of the water spray is blocked.
- For a walk-in shower where the window is located in the shower wall area, a recessed design or an additional glass wall is often a smart choice. This keeps the walkway comfortable and provides better protection for the window.
- In smaller bathrooms, a compact solution with a door or sliding door may be more practical than a completely open layout. This provides better separation between wet areas and a safer entry.
- If there is also a bathtub in the room, make sure to leave enough space between the bathtub and the shower for comfortable use and to prevent water from pooling on the walkways.
- At Refresh Bathrooms, we regularly use these types of layouts, featuring walk-in showers, side walls, niche installations, and durable, fully waterproof wall panels in the shower that are well-suited for quick renovations.
Which window solution is suitable for the wet area?
The right solution depends on privacy, ventilation, ease of cleaning, and the amount of water that comes into contact with the window. If there are recesses or window jambs around the window, choose custom-made shower wall panels to ensure a tight fit.
| Window Solution | Benefit | What to Look For |
|---|---|---|
| Fixed glass | Few seams and moving parts, making it practical for use in wet areas | Ventilation must then be properly managed elsewhere |
| Tilt-and-turn window | Great for extra ventilation after a shower | Hinges and latches are subjected to greater stress when exposed to splashing water |
| Privacy Glass | Lets light in while limiting visibility from the outside | Does not solve the problem of water staining; the finish remains important |
| Matte film | A Quick Solution for More Privacy | Only suitable for high-quality glass and requires careful cleaning |
| Moisture-resistant window frame | More resistant to wet conditions | Custom solutions are often needed for low windows or awkward window sills |
| Finishing around the window | Protects the entire connection from moisture | This is especially important if the walk-in shower is right in front of the window |
For a seamless, watertight finish around the shower window, bathroom wall panels are a logical choice.
Ventilation and Sealing: How to Prevent Moisture Problems Around Windows
Moisture problems are usually not caused by a single wet shower, but by surfaces drying too slowly. That’s why mechanical ventilation, natural ventilation, and drying time must work together effectively. Opening the bathroom window after showering is often a good idea, especially if drier outside air is coming in and the exhaust fan is running at the same time. In cold or humid weather, good ventilation in the bathroom remains especially important.
Also, pay attention to the details: sealant joints must be intact, the windowsill should slope slightly downward, and water should not pool on the window frame or edge. Wooden window frames, old sealant, and poor connections deserve special attention. Read our tips for waterproofing a shower corner before installing a shower there safely.
How to Clean a Shower Window Without Leaving Streaks or Limescale
- After each shower, wipe the window and the adjacent shower glass dry with a squeegee. This helps prevent streaks and limescale buildup.
- Be sure to dry the window frame, the windowsill, and the bottom corners as well. That's where water and soap residue tend to linger the longest.
- Clean the shower window weekly with a soft cloth or sponge and a mild, pH-neutral cleaner.
- Do not use harsh abrasives on film, coatings, sealant, or delicate window frame finishes.
- Pay special attention to edges, caulk lines, and the joints between the window, wall, and shower stall. That’s exactly where moisture and dirt tend to accumulate.
- Regular cleaning not only keeps it looking better, but also helps sealant, film, and finishes last longer.