Making a shower corner watertight requires more than just neat tiles or a clean sealant edge. It is precisely the junctions between the wall, floor, drain, and wall penetrations that determine whether a shower area will remain dry and reliable in the long term. On this page, you’ll learn where the critical points are and when a complete renovation with a watertight wall finish is the logical solution.
Why Waterproofing the Shower Corner Is So Important
In a shower corner, a small area is exposed to a lot of water on a daily basis. If moisture gets behind the finish, problems often start out invisible. These can include peeling finishes, mold growth, soft substrates, or leaks into adjacent spaces.
Effective waterproofing, therefore, isn’t just about the surface. The entire structure of the shower wall, floor, corners, and connections must be done correctly. This is especially important in a walk-in shower or a shower without a high step, because water spreads more easily toward the edges and the floor.
The most vulnerable parts of a corner shower
If you want to waterproof a shower corner, you should pay particular attention to the areas where materials meet or move. These are usually not the flat parts of the wall, but rather the details.
- Wall-to-floor transitions – water often accumulates here for long periods of time.
- Inner corners – corners are prone to slight movement and cracking.
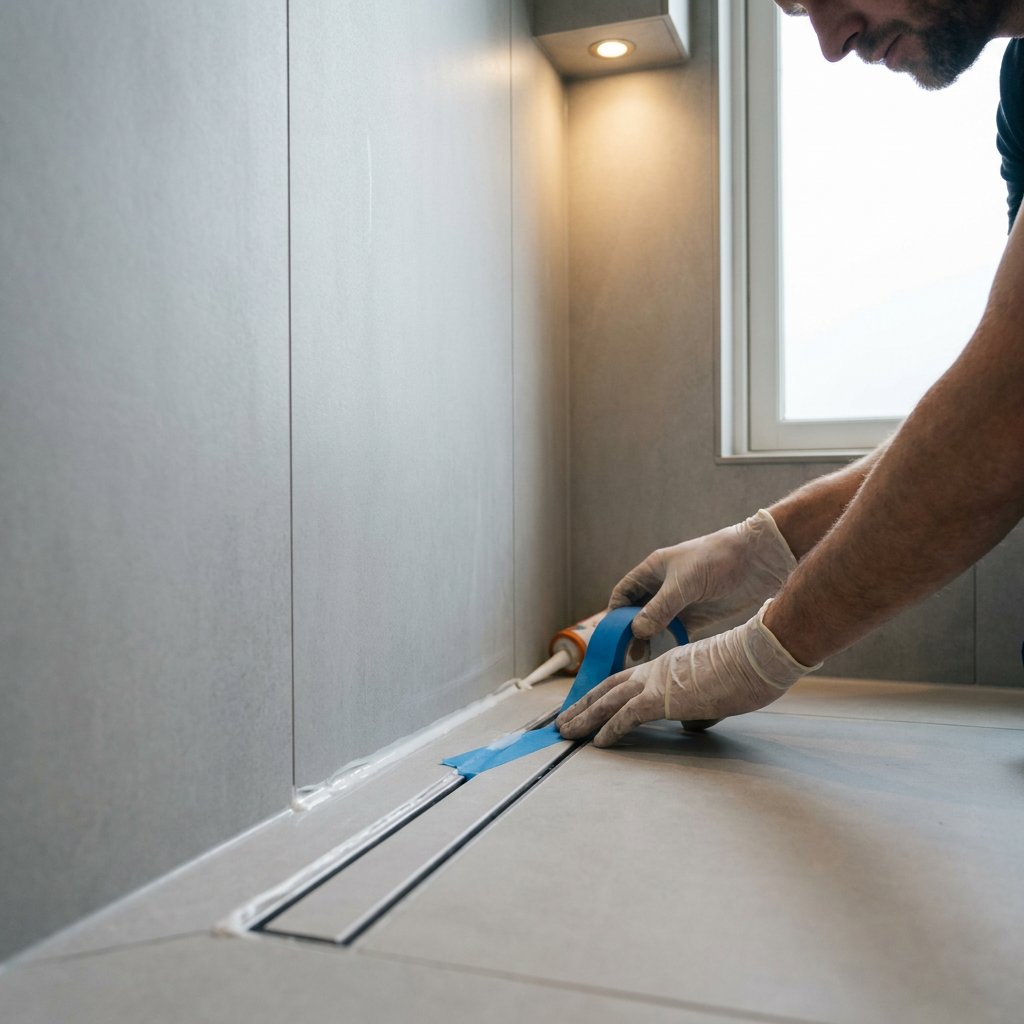
- Connection to the drain or shower channel —a minor oversight can lead to leaks later on.
- Pipe penetrations and faucet connections —openings in the wall must be carefully finished.
- Seams and caulked joints —these must fit neatly against the rest of the watertight structure.
That is precisely why waterproofing a shower corner is a job that requires precision. A finish that looks neat is not necessarily technically watertight.
What a Good Waterproof Installation Must Meet
A durable shower corner consists of multiple layers that work together to keep water out of the structure. The visible finish is only part of the whole. Beneath it, the structure must be suitable for wet areas and properly sealed at all edges and penetrations.
Key points to consider are:
- A stable and suitable surface —any loose, damaged, or moisture-sensitive areas must be repaired first.
- Waterproof sealing of critical joints —especially in corners and at connections.
- A reliable connection between the wall and the floor —without any open or rigid weak spots.
- Careful finishing around drains and piping —these are common risk areas.
- A flexible finish where movement may occur —to help prevent cracks and moisture penetration.
Simply grouting or sealing is therefore not enough if the underlying structure is not watertight.
Properly seal corners, edges, and seams
It’s no surprise that the question of how to seal the corners in a bathroom comes up so often. In the shower corner, these are the points where stress, water pressure, and material transitions all converge.
A good approach starts with a watertight foundation in the corner area itself. Only then should the visible finish be applied. The same applies to the edges: the junction between the wall and the floor, shower pan, or walk-in shower floor must be carefully crafted in every detail and not just appear watertight.
Seams also deserve attention. A sealant joint helps with the finish, but it does not replace a fully watertight structure behind the visible layer. Especially in existing showers where the sealant edges are worn out, it’s wise to look beyond just the outer edge. You can find practical installation tips in our guide to installing shower wall panels.
Making Shower Enclosures Watertight During a Renovation
When renovating, the condition of the existing shower walls is a key factor. Sometimes only the finish is outdated, but in other cases there are underlying issues, such as damaged substrates, old tiled walls, or outdated plumbing connections.
Refresh Bathrooms performs complete shower and bathroom renovations, installing waterproof wall panels in the shower area. These panels are suitable for use in wet areas and can also be installed over existing tiles; read more about wall panels over tiles. Do you want fewer seams and, therefore, a lower risk of leaks? Consider seamless wall cladding for the shower.
Since installation, seam finishing, and connections are part of the renovation, this is especially relevant if you don’t just want to have a single sealant edge repaired, but want to rebuild the entire shower area to be durable again.
Pay special attention to the floor and drain
When waterproofing a corner shower, a lot of attention is paid to the walls, but the floor and drain are just as important. Water always takes the path of least resistance. That’s why the connection between the floor finish and the drain must be properly installed, especially in a walk-in shower.
The transition from floor to wall must also be done properly. If there’s a weak spot there, moisture can slowly seep under the finish. You often don’t notice these kinds of problems until later, when the damage has already progressed further.
If you're replacing a bathtub or shower pan with a walk-in shower, it's a good idea to include the waterproofing as part of the overall installation right from the start, rather than just making changes to the visible parts.
When is local repair not enough?
Minor damage or a worn-out caulk joint doesn't always mean that the entire shower enclosure needs to be replaced. However, there are situations in which a spot repair alone won't solve the real problem.
- Recurring leak despite resealing
- Loose tiles or finishing in the shower area
- Moisture stains on adjacent walls or floors
- Mold or a musty odor that keeps coming back
- Outdated corner shower unit in which multiple connections are vulnerable at the same time
In such cases, a complete renovation is often the safer choice. That way, you address not only the visible symptom but also the underlying structure.
Renovate Your Corner Shower Without Unnecessary Hassle
If your shower corner is no longer reliably watertight, you’ll want a solution that’s durable and causes as little disruption as possible. Refresh Bathrooms specializes in complete renovations of bathrooms and shower areas, with quick turnaround and watertight wall finishes as part of the overall project.
This is especially suitable if your shower enclosure needs replacing, you want to convert a bathtub into a shower, or you’re ready for a modern shower without a lengthy renovation. This way, you combine waterproofing, style, and ease of use in a single renovation solution. Looking for a professional solution and want to have a walk-in shower installed right away?
Frequently Asked Questions
How do I waterproof the shower corner?
A shower corner is made watertight by properly constructing the entire wet area, including the walls, floor, corners, seams, penetrations, and drain. Tiles alone or a new sealant bead are usually not enough if the underlying structure is not sound.
How do I waterproof the edges of my bathroom?
Edges must fit properly with the rest of the waterproof shower area. The transitions between the wall and floor, and between the wall and the shower area, are particularly important. The visible finish helps, but the actual waterproofing must already be properly installed underneath.
How can I make shower walls watertight?
That depends on the current situation and the chosen renovation solution. For a complete renovation, waterproof wall finishes suitable for use in the shower area can be installed. Refresh Bathrooms uses waterproof plastic composite wall panels for this purpose.
When is a complete renovation a better option than just re-caulking?
If leaks recur, the finish is peeling, water stains appear, or the shower enclosure is clearly outdated, simply resealing the joints is often not enough. In that case, it’s wiser to renovate the entire shower area.